Getting Started with PrimeCal Cloud
The cloud version of PrimeCal at app.primecal.eu is the fastest way to get up and running. There's nothing to install, no server to configure, and the free plan covers everything most individuals need.
What You Need
Just a browser and an internet connection. That's it. See System Requirements for specific browser versions if you're not sure yours qualifies.
Step 1: Go to the App
Open https://app.primecal.eu in your browser.
You'll see the PrimeCal login page. If you don't have an account yet, click Sign up (or Create account).
Step 2: Create Your Account
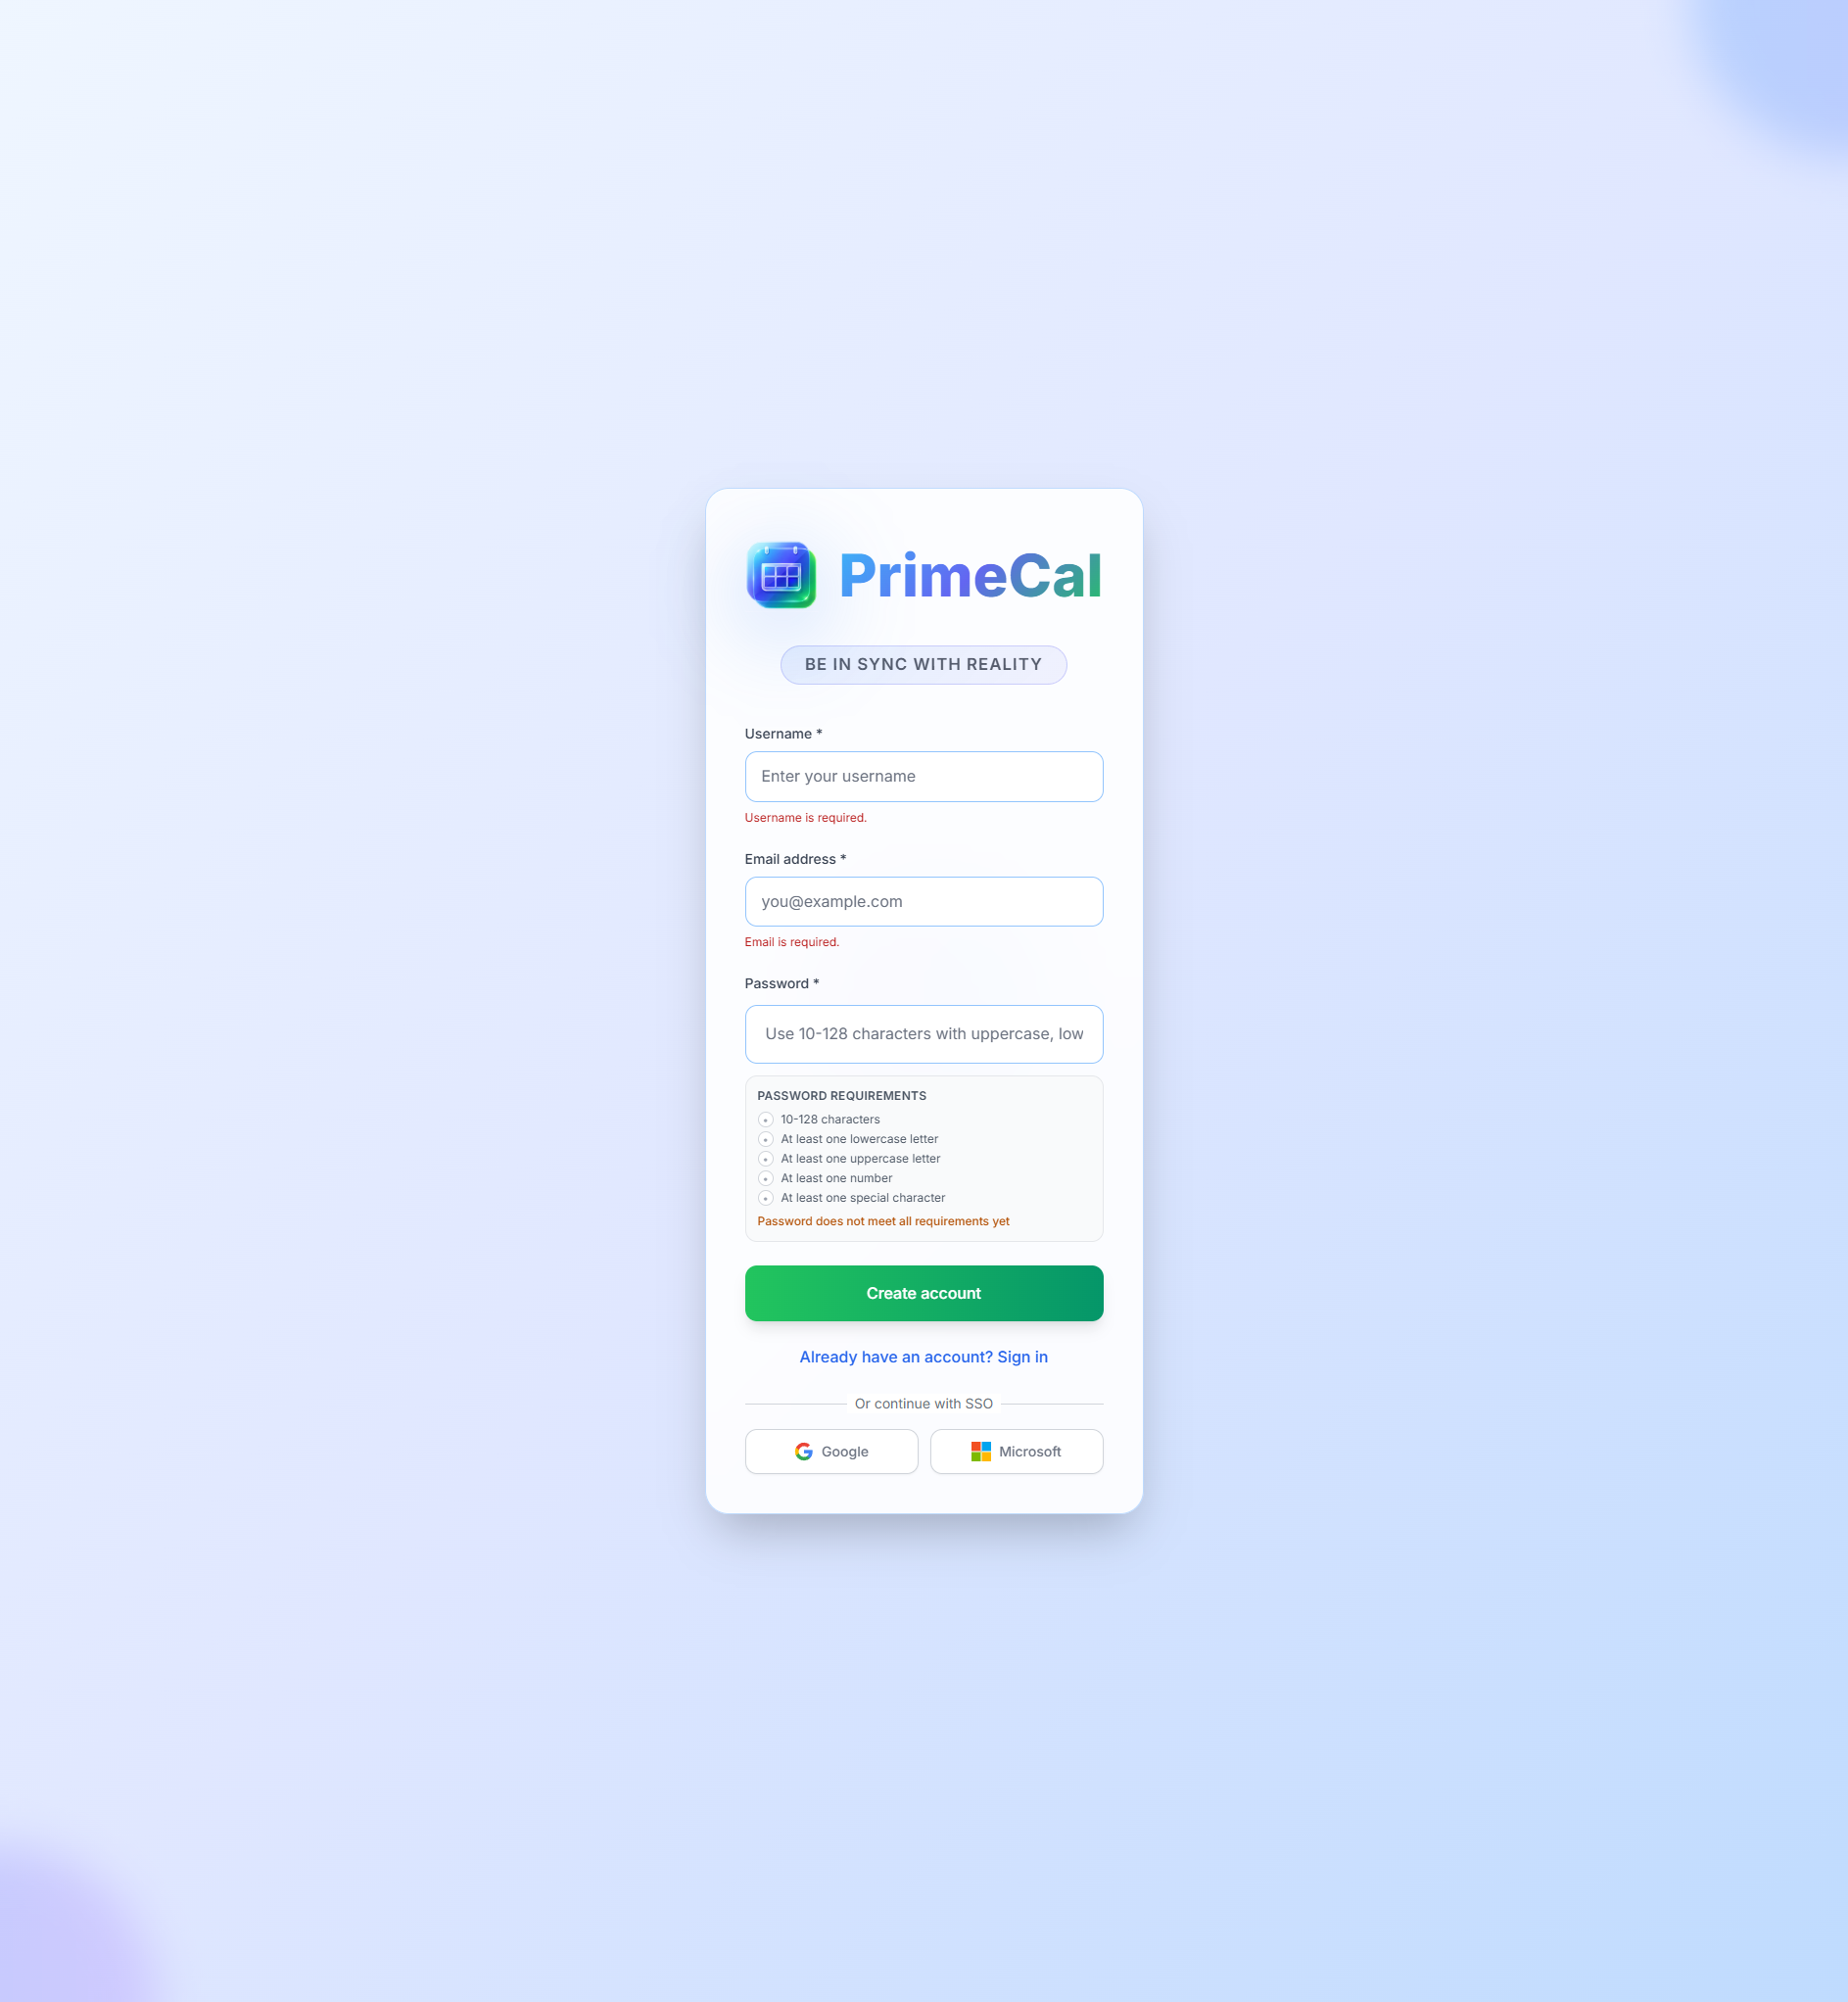
Fill in the registration form:
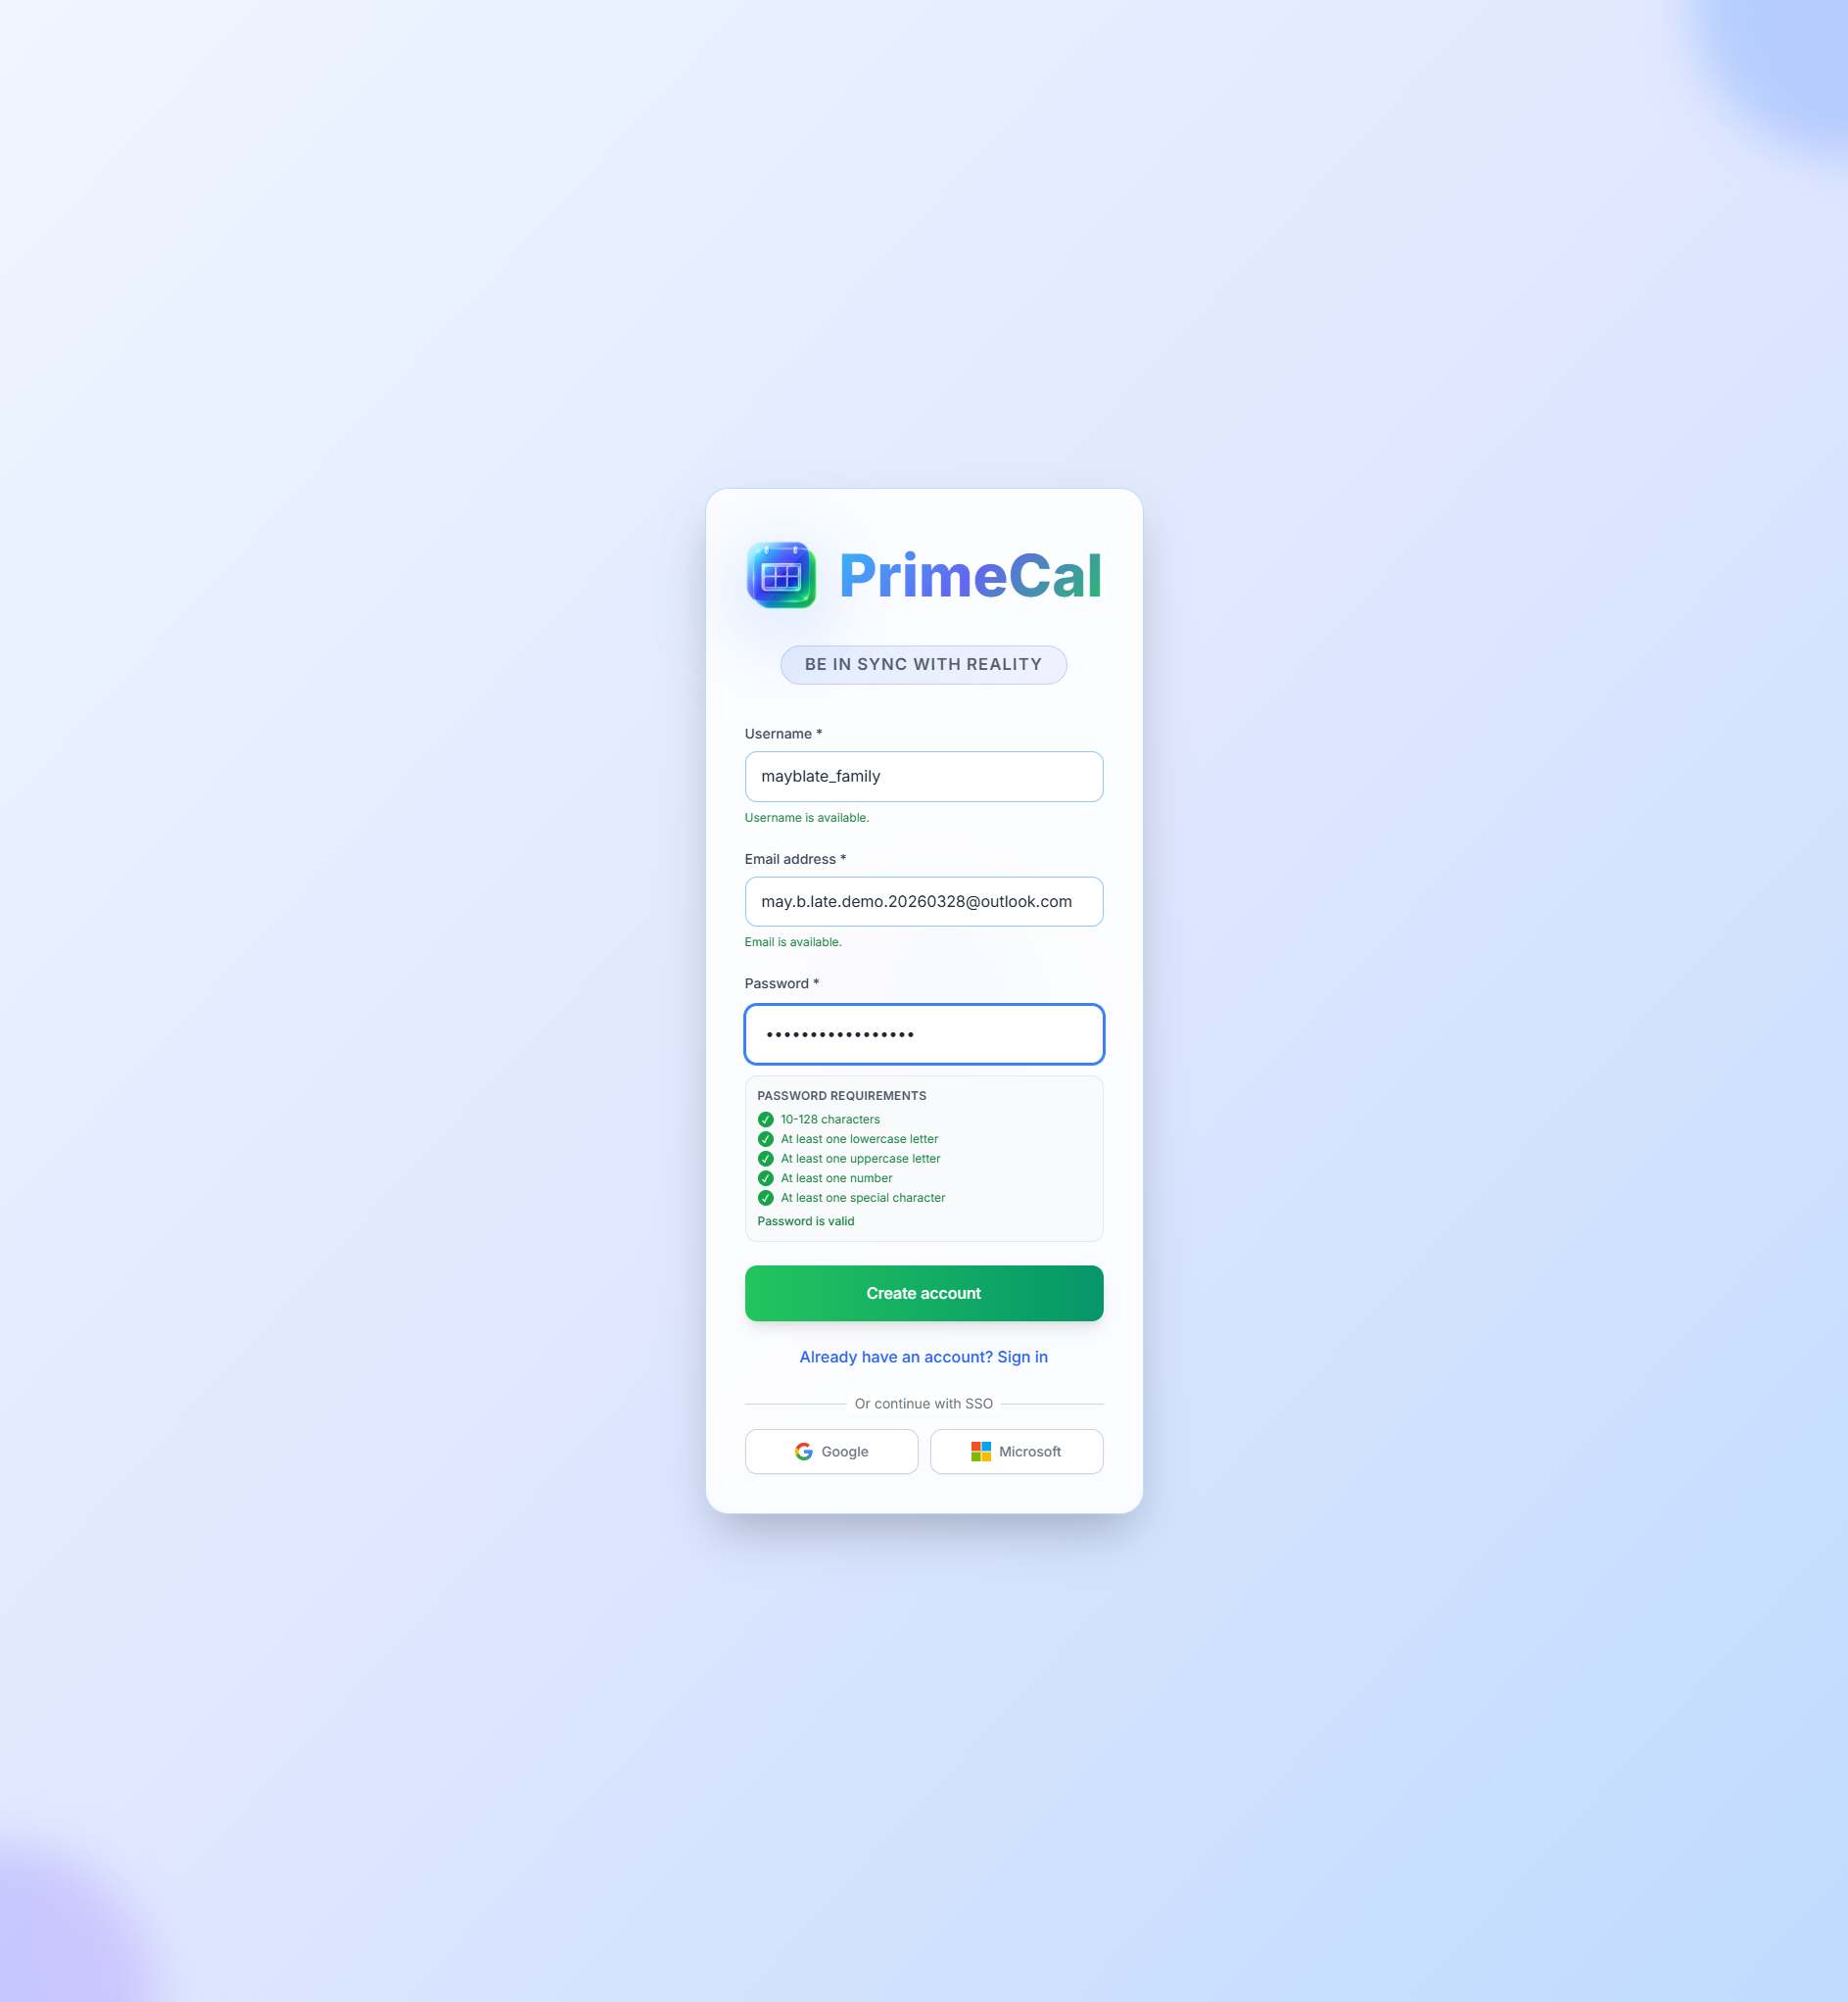
- Username — your unique identifier in PrimeCal. Other users will share calendars with you using this name, so pick something recognizable (like your first name or a nickname).
- Email address — used for account recovery and optional notifications.
- Password — choose something secure (at least 8 characters).
Click Create account to continue.
Step 3: Complete the Onboarding Wizard
After registering, PrimeCal walks you through a short setup wizard to personalize your experience. There are five steps:
Step 1: Welcome — Your Profile
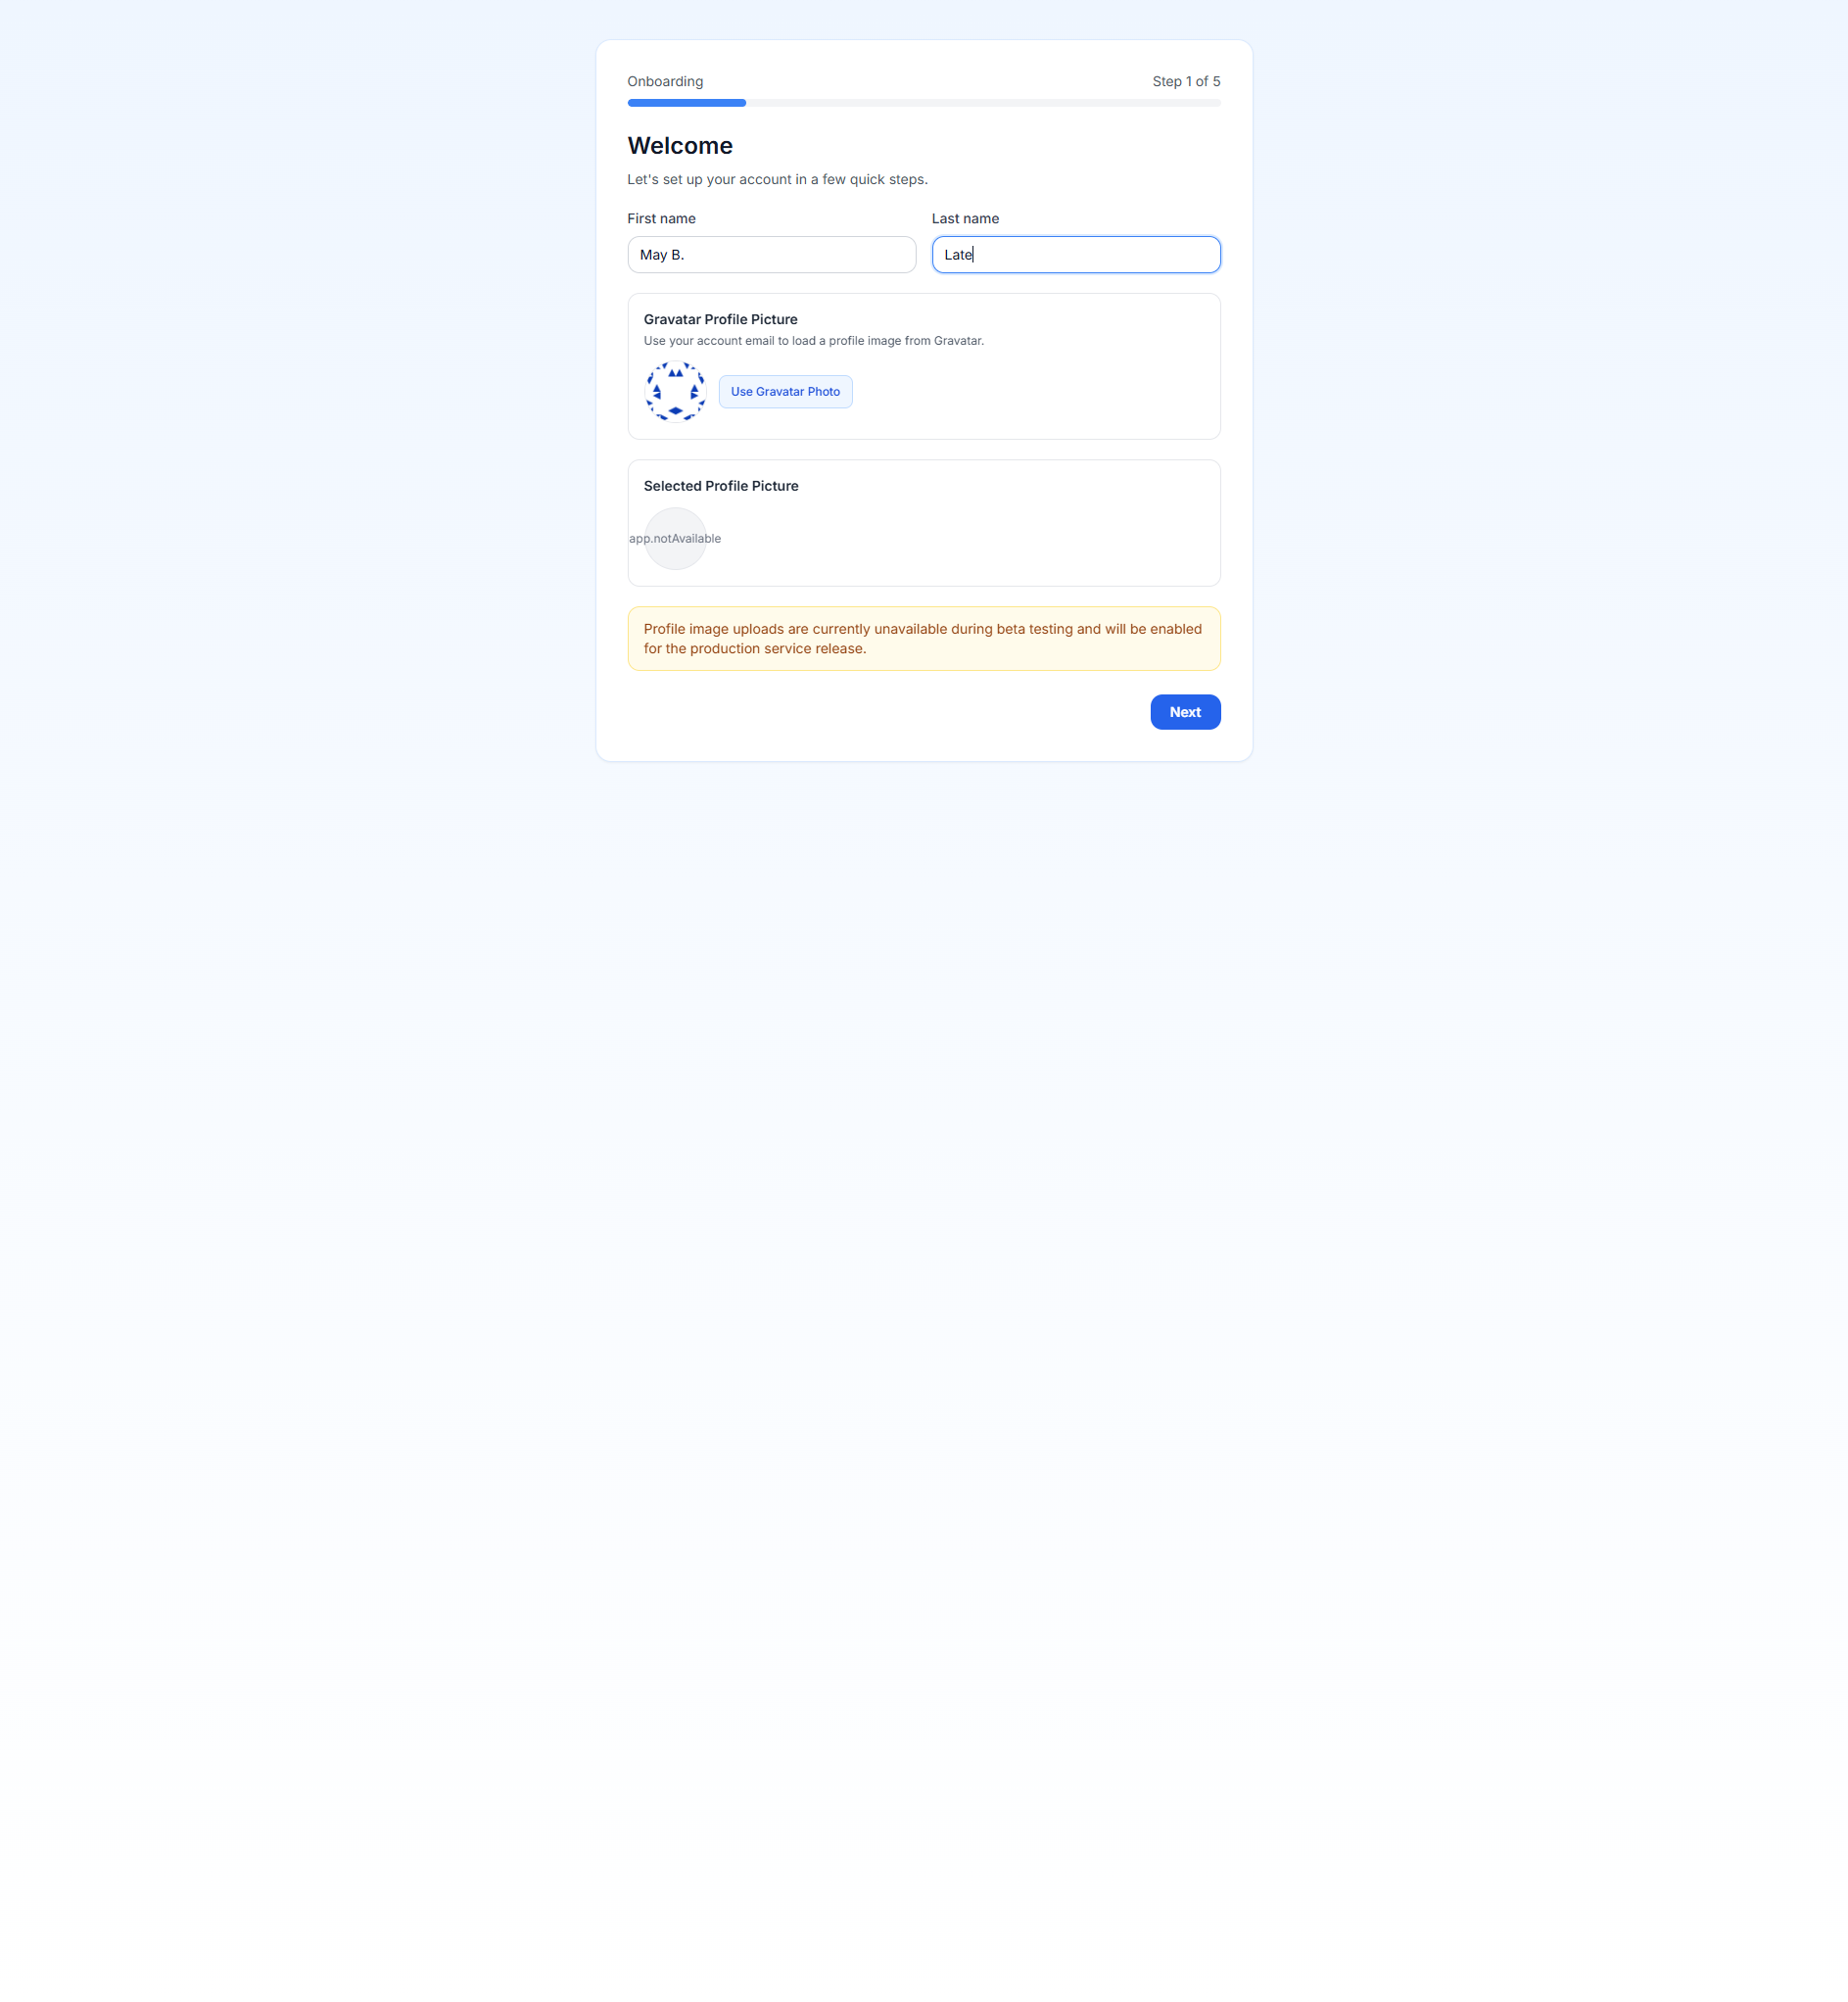
Enter your display name — this is how you'll appear in the app and to people you share calendars with. You can also upload a profile picture if you like.
Step 2: Personalization — Language and Timezone
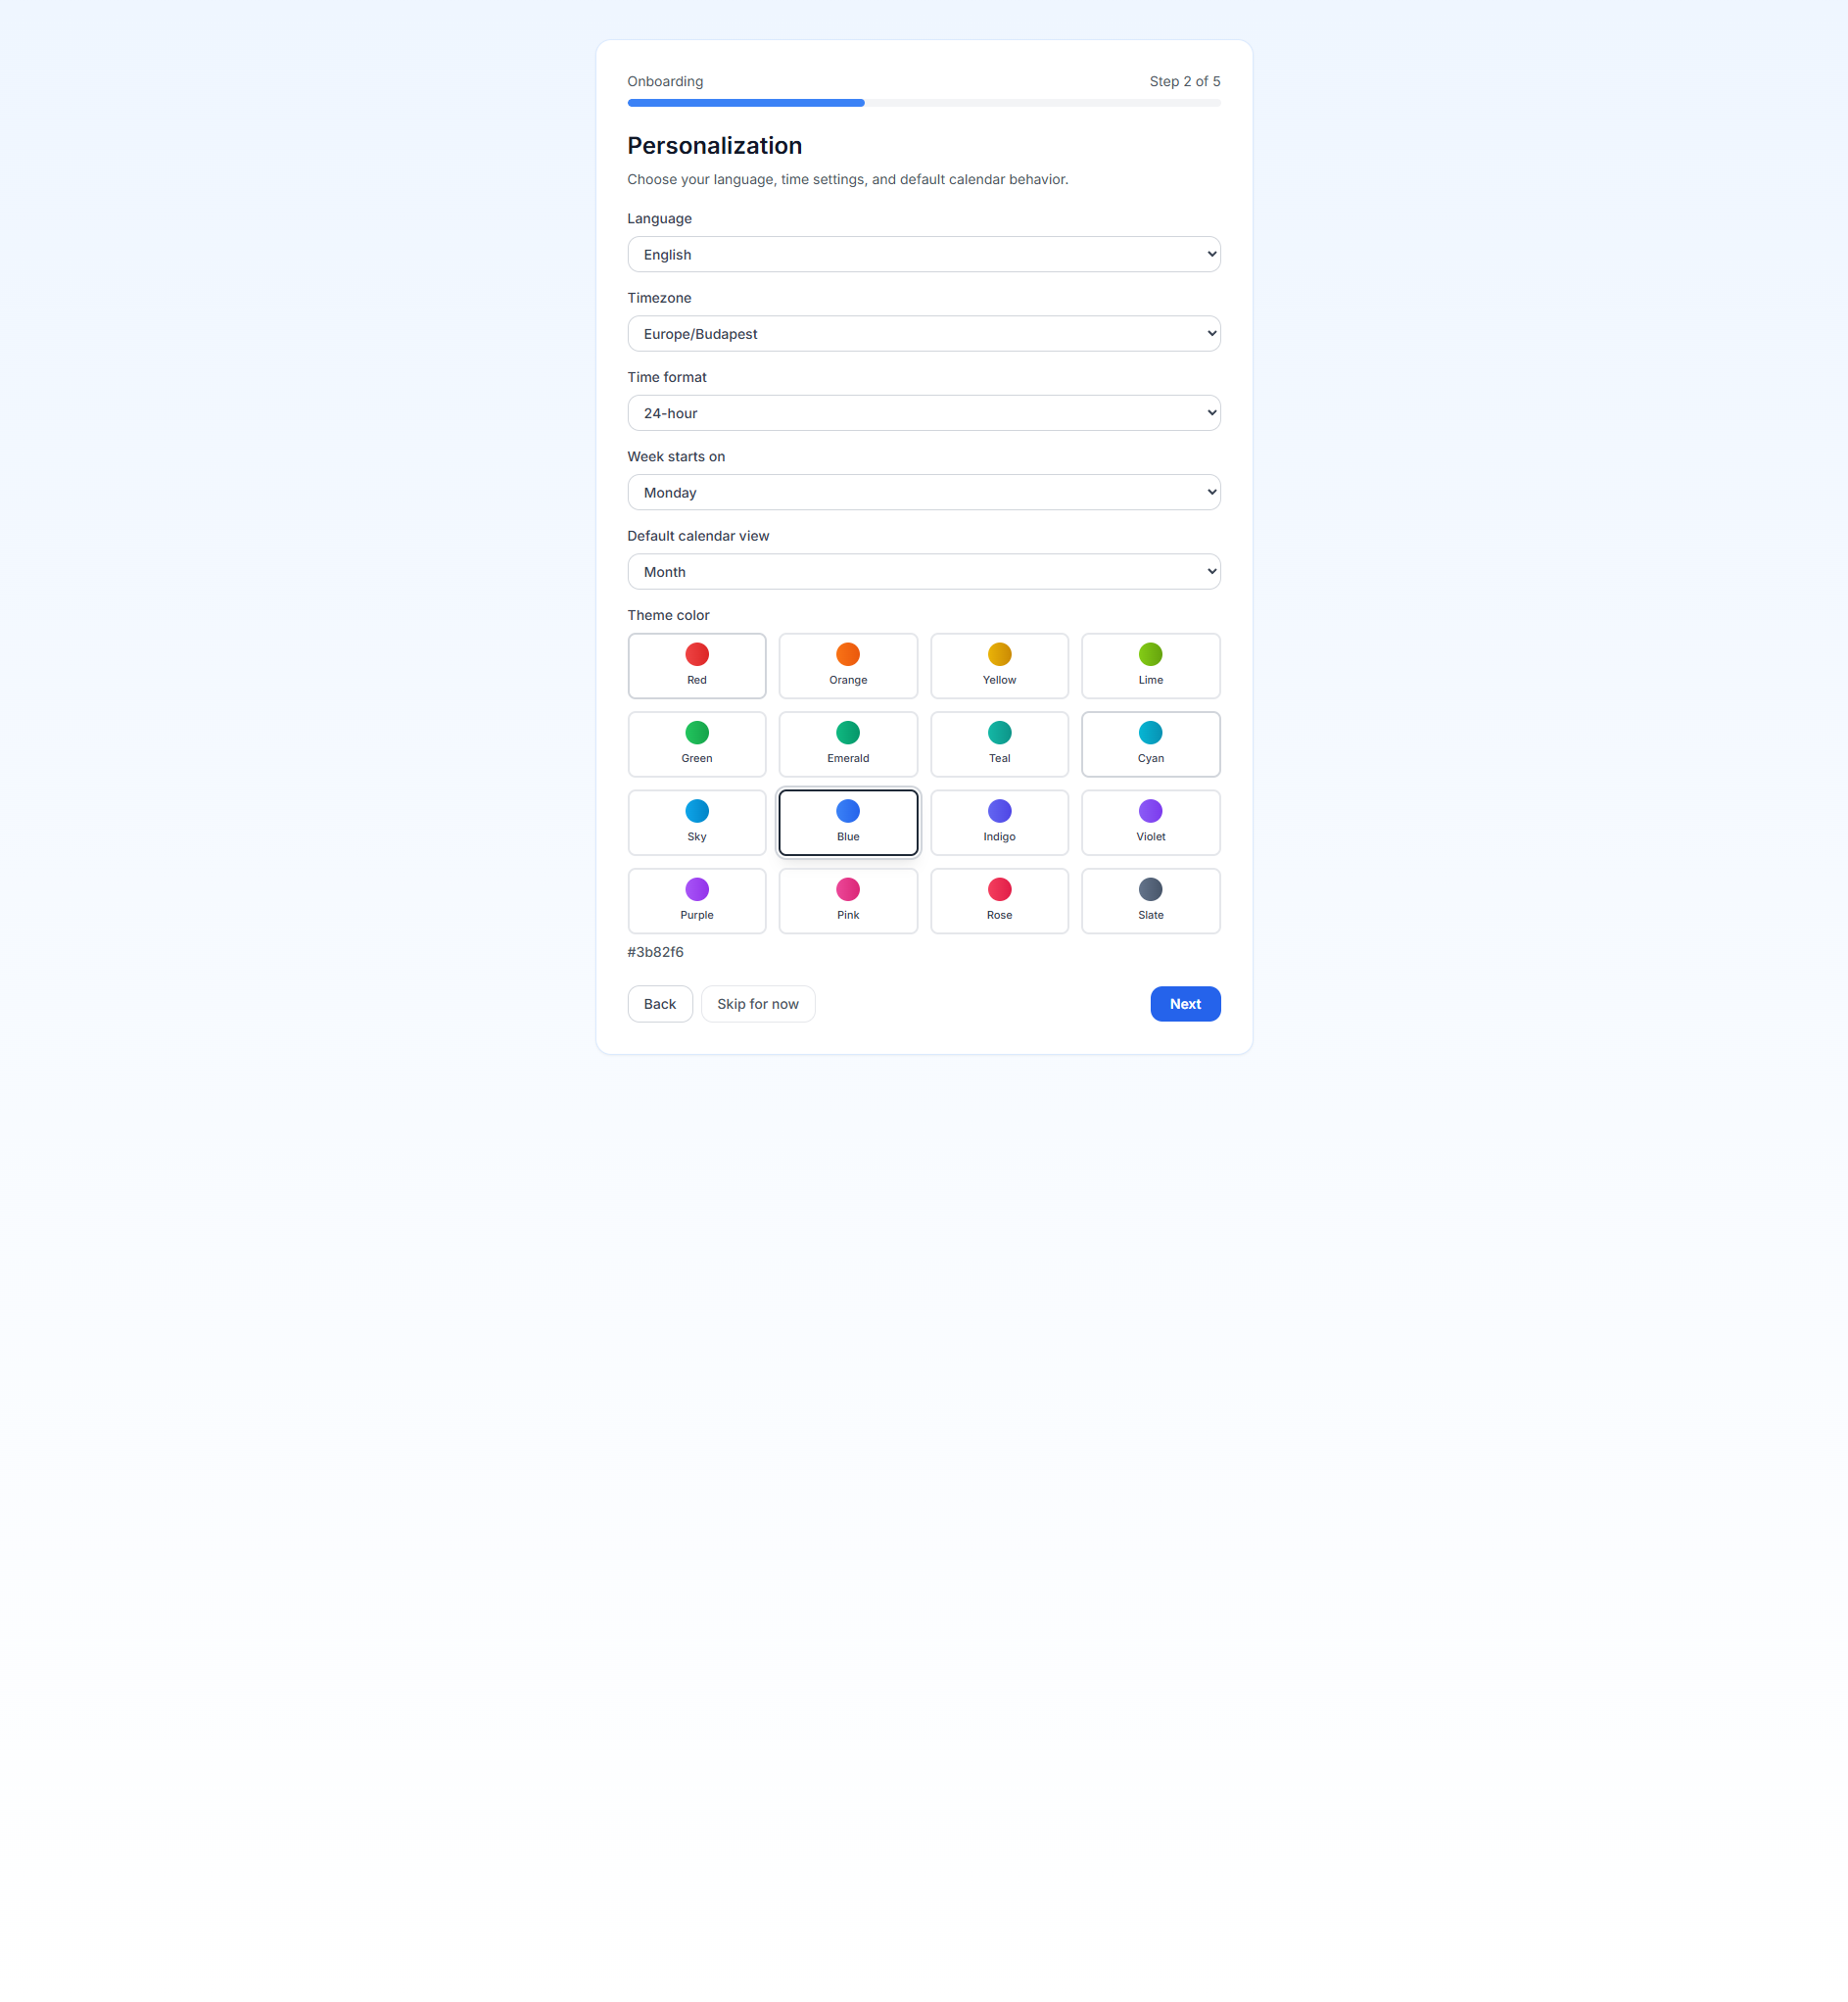
Choose:
- Language — PrimeCal is available in English, Hungarian, German, and French.
- Timezone — PrimeCal supports 70+ timezones from Auckland to Anchorage. All event times will display in your chosen timezone.
If you travel frequently, you can always change your timezone later in your profile settings. Events are stored in UTC and displayed in whatever timezone your profile is currently set to.
Step 3: Compliance — Privacy and Terms
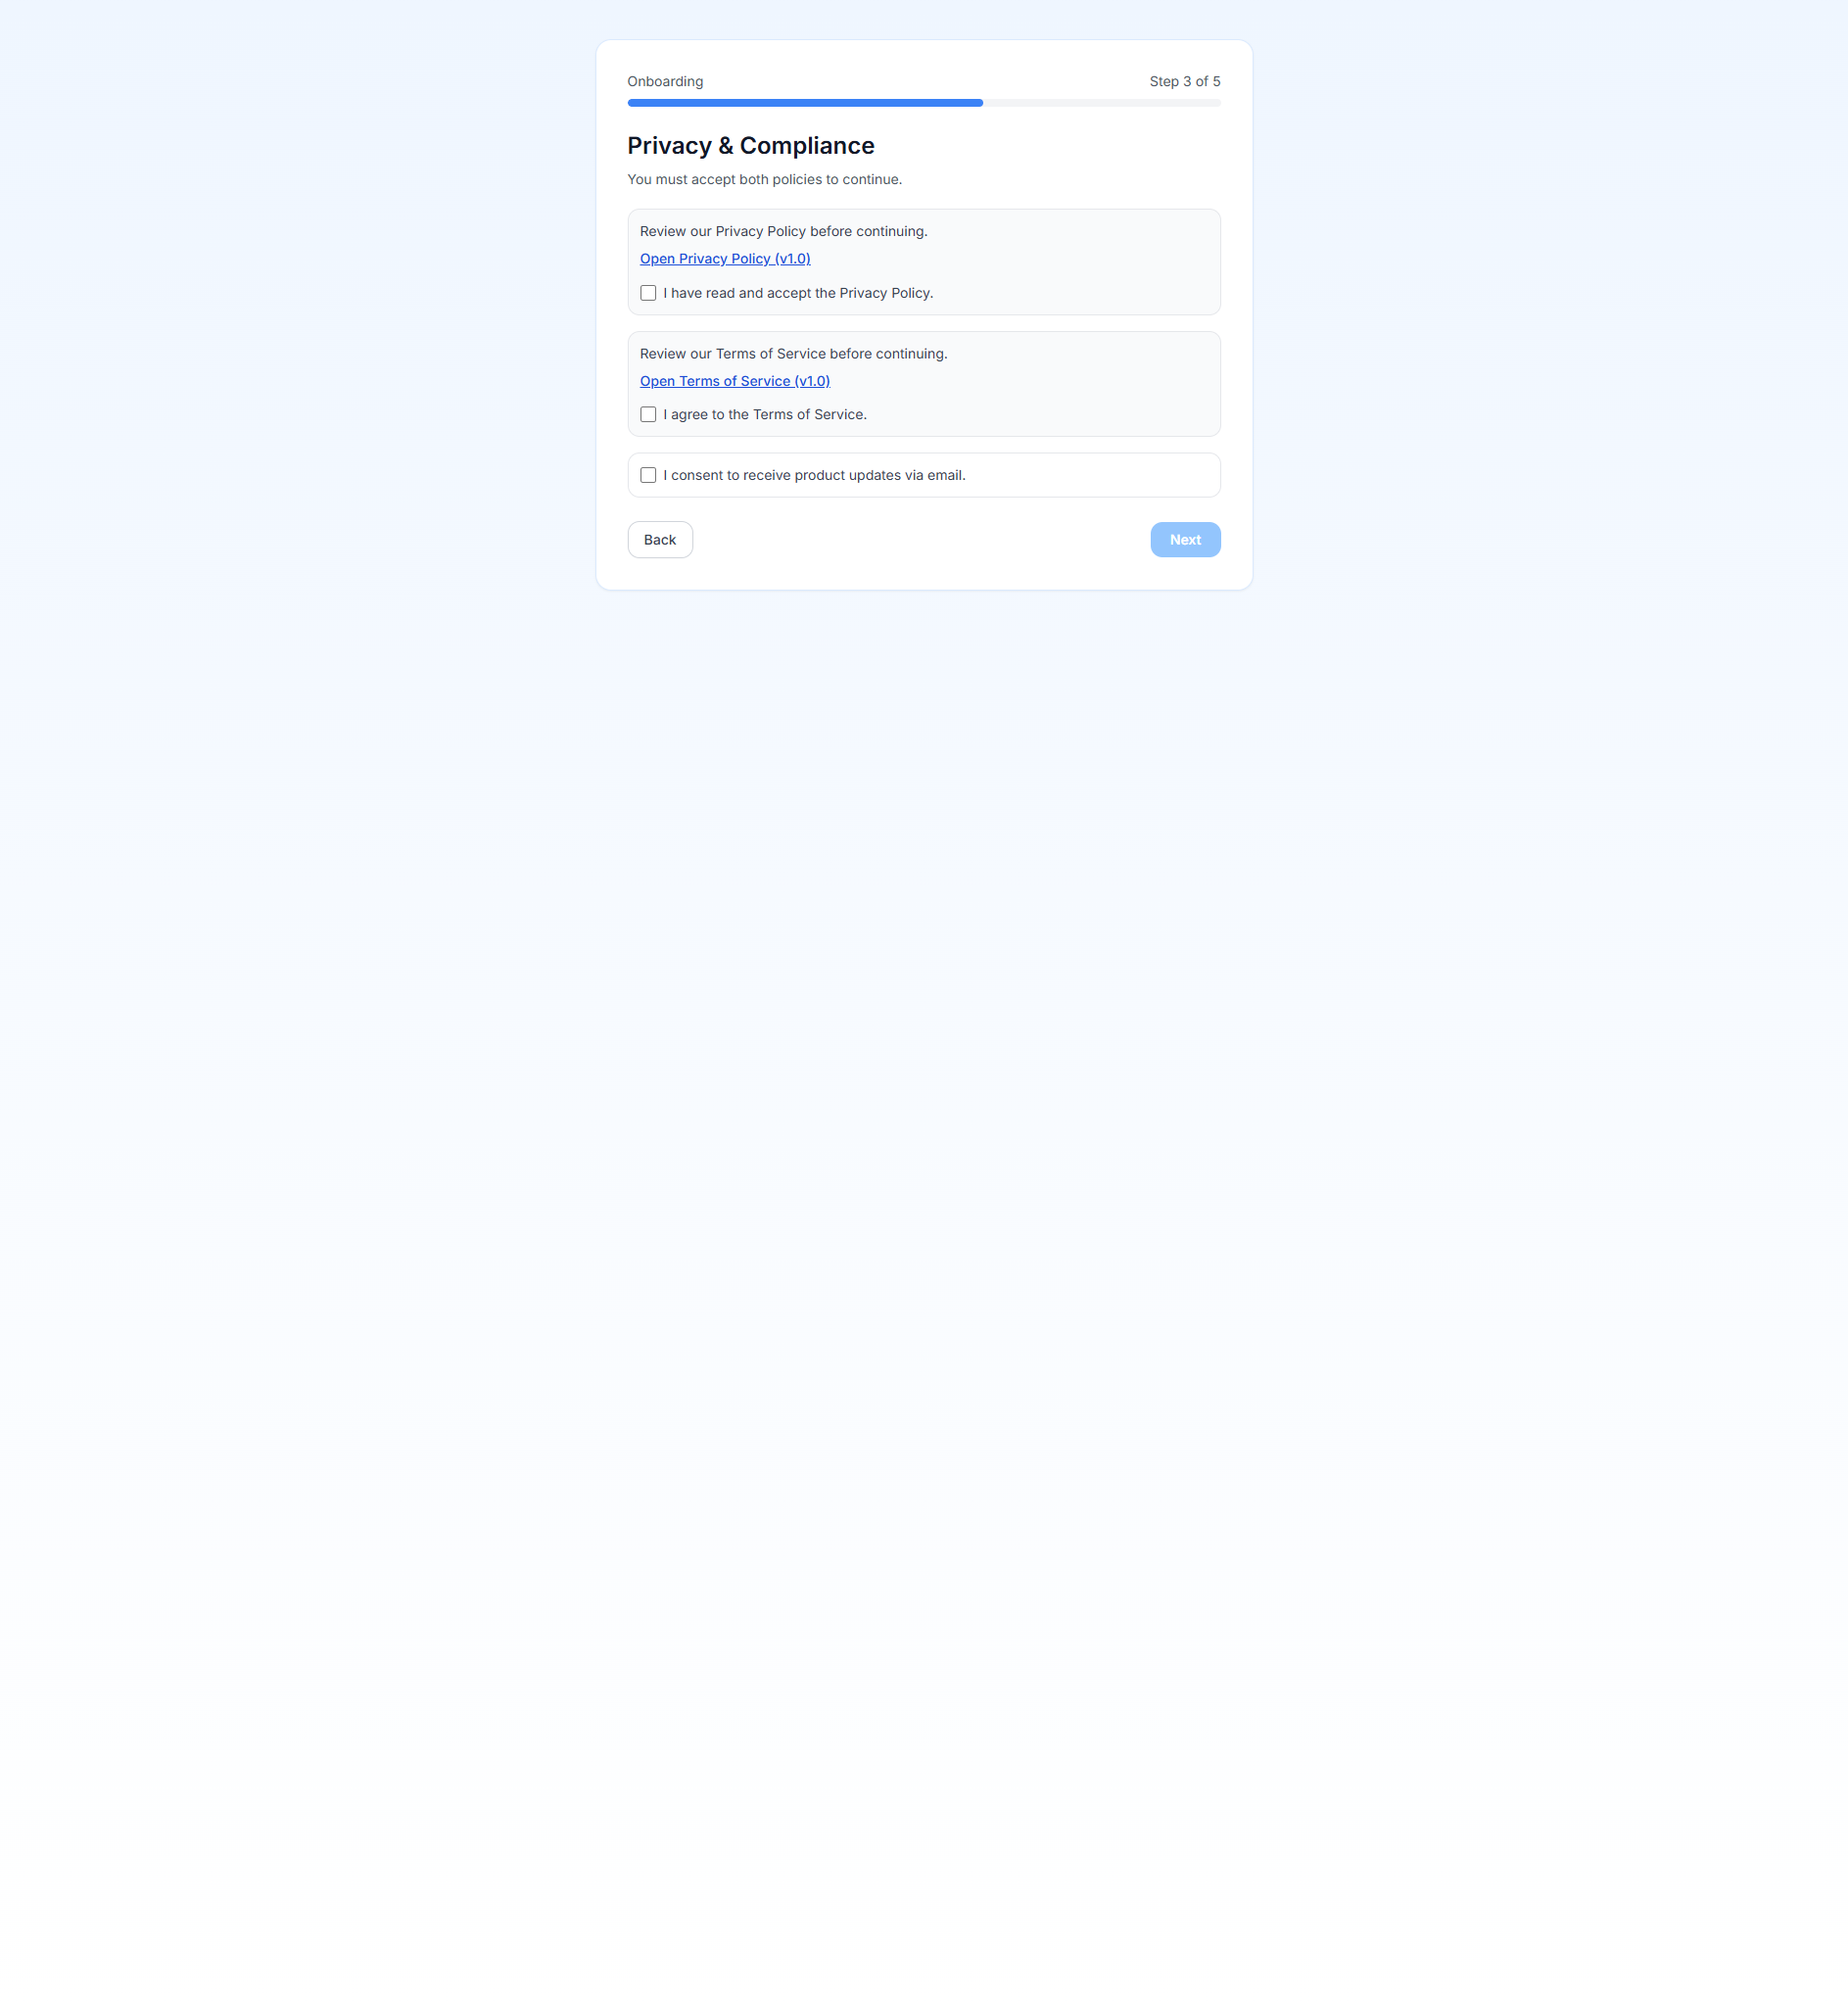
Review and accept the privacy policy and terms of service. This step is required.
Step 4: Calendar Preferences
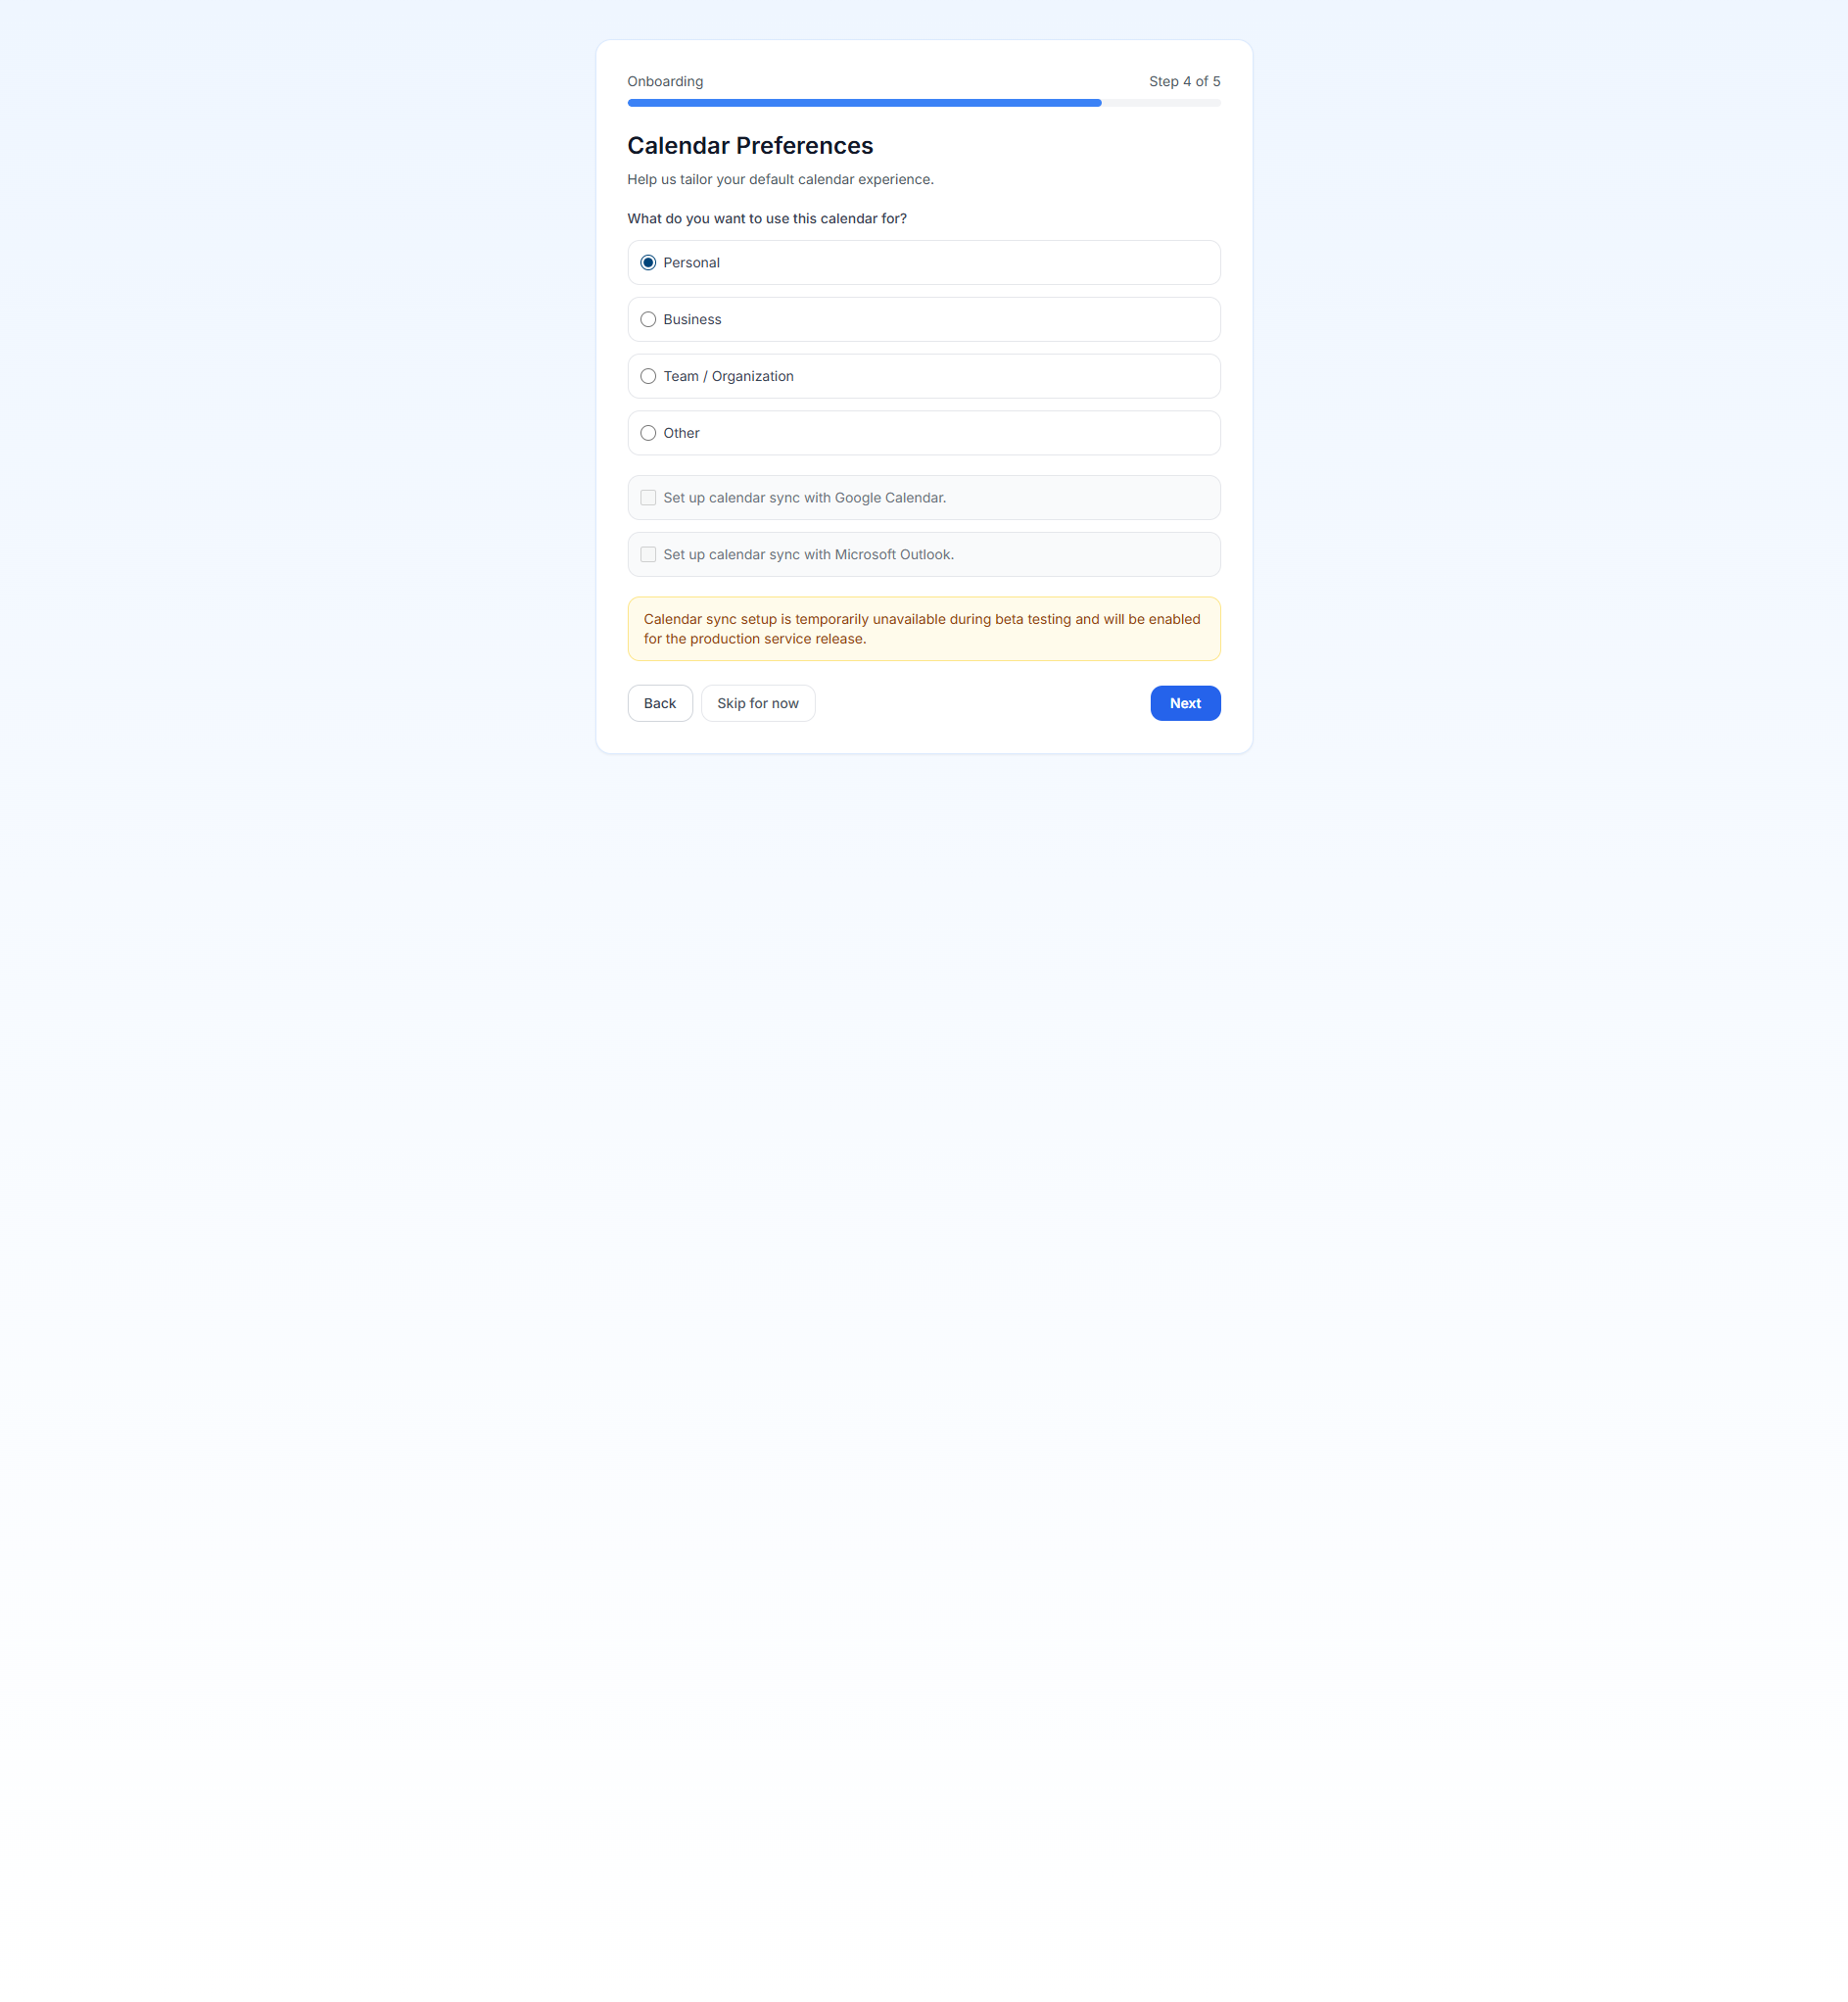
Configure your default calendar display:
- Week starts on — Sunday or Monday
- Time format — 12-hour (AM/PM) or 24-hour
- Default view — which view opens when you log in (Focus, Month, or Week)
Step 5: Review
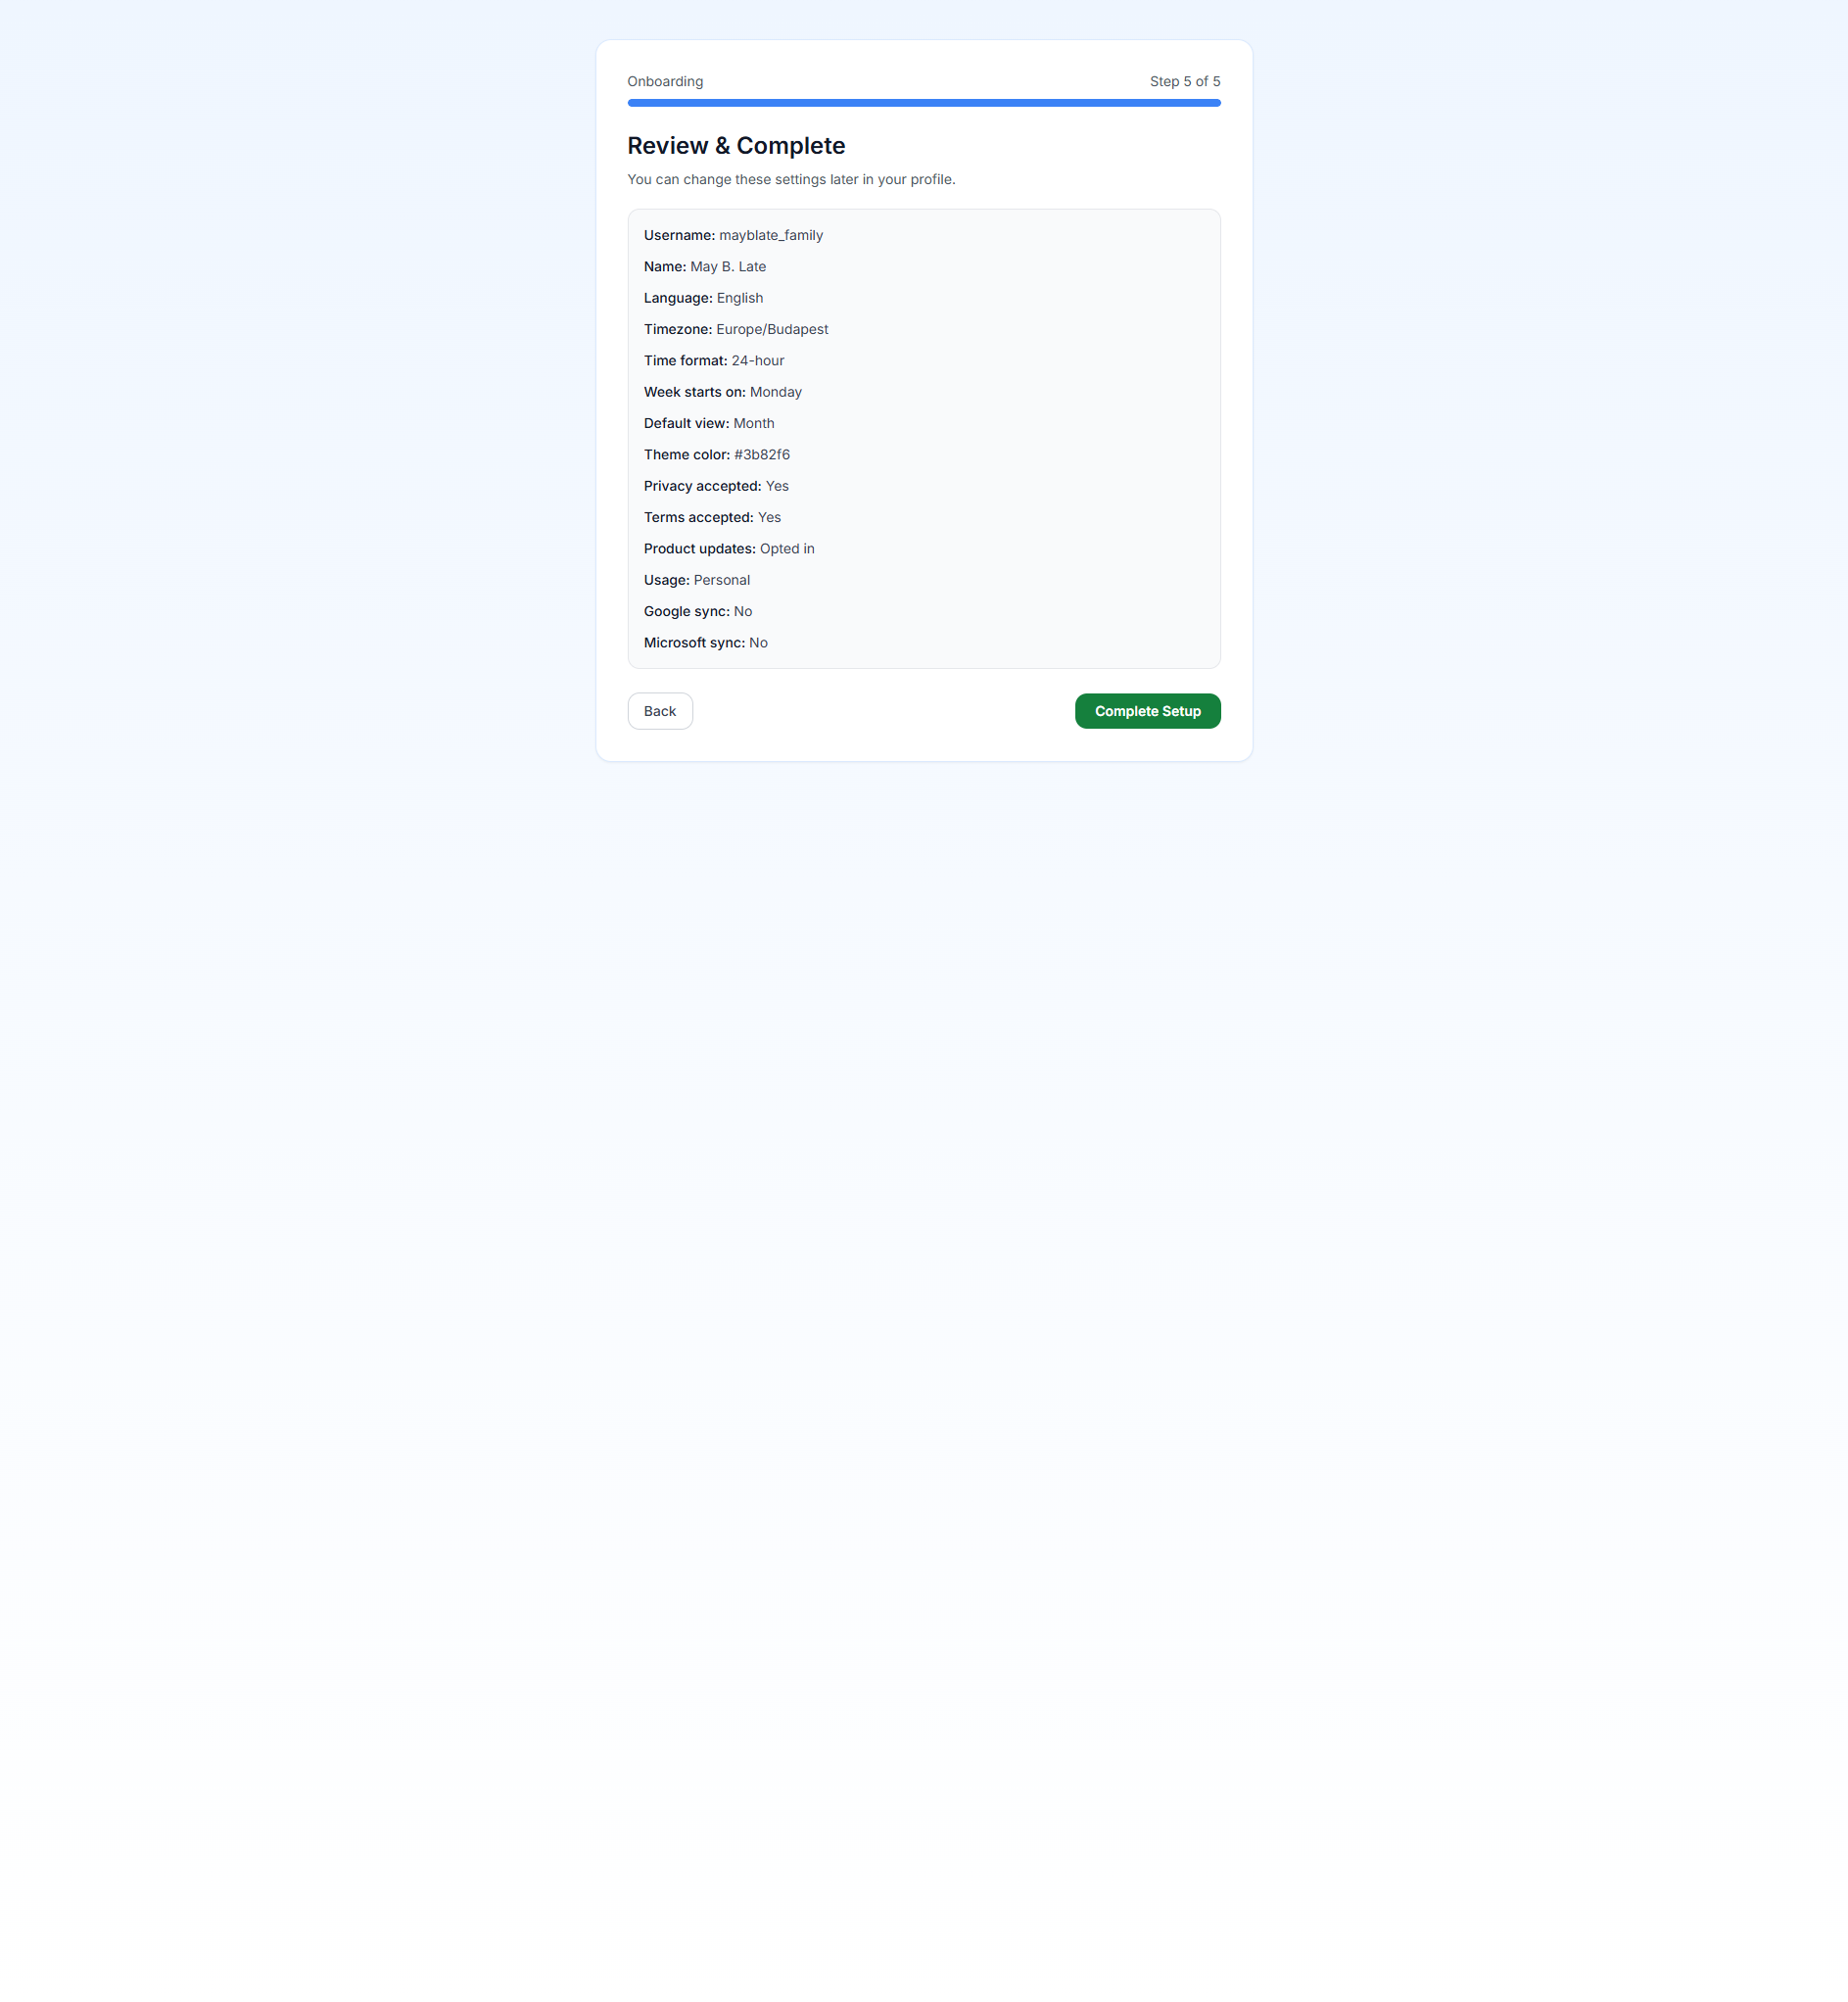
Review your settings. If anything looks wrong, use the Back button to go back and fix it. When everything looks good, click Finish (or Get started).
Step 4: You're In
PrimeCal will create your first calendar automatically and take you to the main calendar view. From here you can:
- Create your first event — click the + New Event button or click any day on the calendar
- Create additional calendars — click the + New Calendar button in the sidebar
- Share a calendar — hover over a calendar in the sidebar → three-dot menu → Share
- Explore the views — try Month, Week, and Focus using the view switcher at the top
See Exploring the Interface for a full guided tour.
Free Plan vs Paid Plans
Your account starts on the Free plan, which includes:
- Up to 5 calendars
- Up to 3 automation rules
- Tasks workspace
- Personal logs
The Free plan is genuinely useful for individual use. When you're ready for more — external calendar sync with Google/Outlook, API access, additional calendars, or sharing a subscription with your family — you can upgrade from the Subscription page (click your profile avatar → Subscription).
You can use PrimeCal on the free plan indefinitely without entering payment details.
Signing In Later
Return to app.primecal.eu at any time and sign in with your username/email and password. PrimeCal uses secure session tokens — you'll stay signed in on that browser until you explicitly sign out.