Creating Automation Rules
Rule Builder
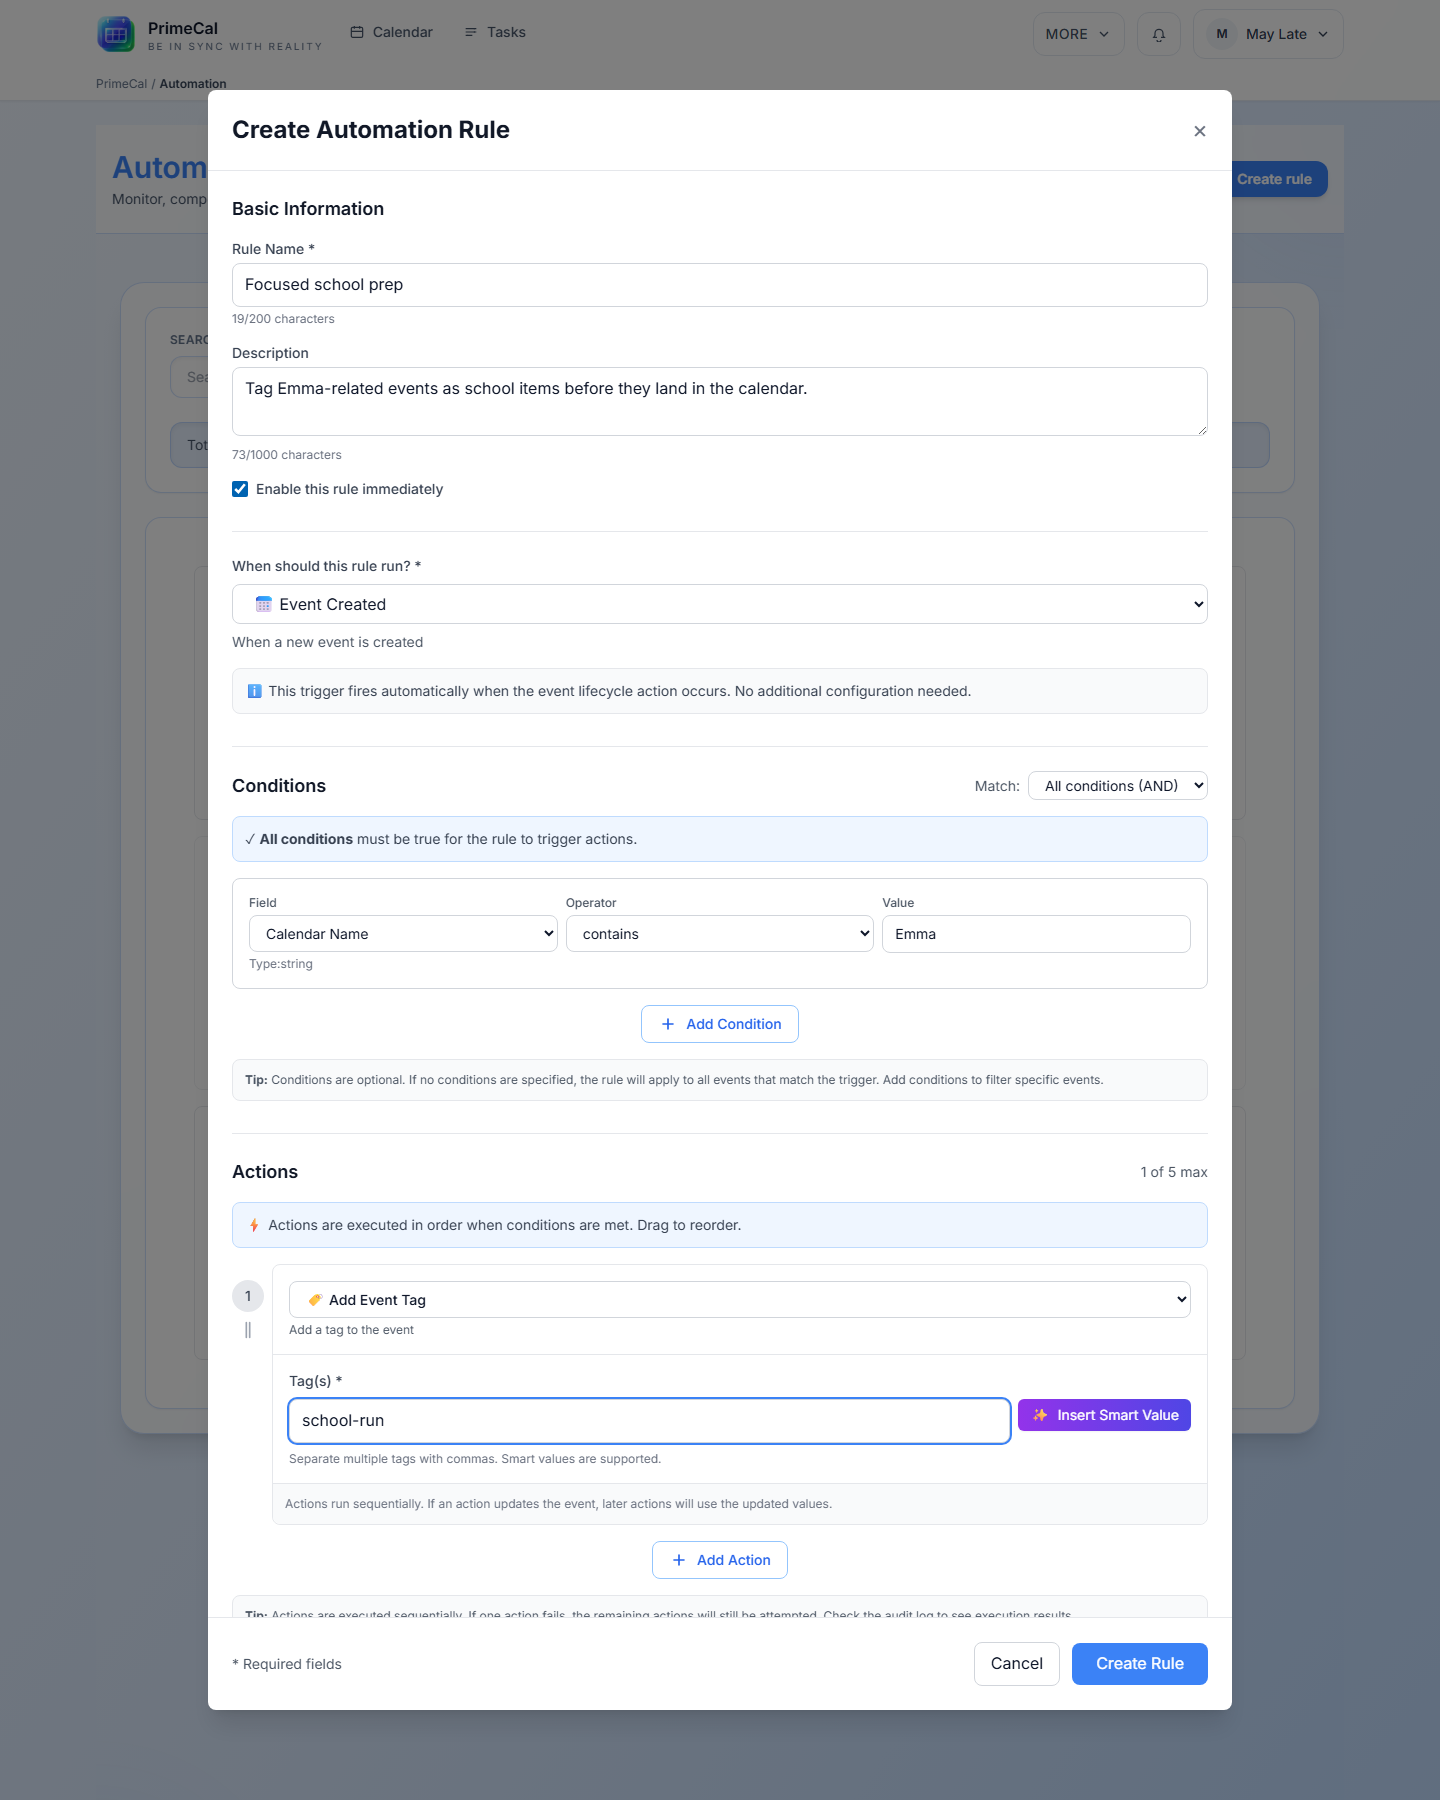
Create a Rule in the Current UI
The automation screen uses a dedicated modal to build one rule at a time. It supports creation and editing, keeps validation client-side, and exposes webhook tools when the selected trigger needs them.
Name and descriptionEnabled toggleTrigger selectorConditions and actions
Open The Builder
- Open the automation page.
- Click
Create Automation Rule. - Fill in the modal from top to bottom.
The same modal is used for editing an existing rule. The button label changes to Update Rule when you edit.
Fields In The Modal
Required
Name
Required, 1 to 200 characters. This is the human-readable rule name shown in the list and detail page.
Optional
Description
Optional text area, up to 1000 characters, used only for your own context.
State
Enabled
Defaults to on. Clear it if you want to save the rule but keep it inactive.
Required
Trigger
Must be chosen before save. The trigger controls which configuration panel appears below it.
Validation Rules
- Name is required.
- Trigger is required.
- Relative time triggers require a valid non-negative offset.
- You can keep conditions empty, but the editor allows a maximum of 10.
- You must define at least one action.
- You can add up to 5 actions.
- Unsupported or coming soon actions cannot be saved.
Save Behavior
Create Rulestores the new rule.Update Rulereplaces the existing rule.- The rule list refreshes after save.
- If you want a rule to execute immediately after creating it, use the rule detail page and
Run Now, or create it and then run it from the detail screen.
Webhook Rules
If you choose the Incoming Webhook trigger:
- The rule exposes a generated webhook token.
- The modal shows the webhook configuration after the trigger is selected.
- The generated webhook URL can be copied for external systems.